Introduction
Ncdu (NCurses Disk Usage) is a text-based disk usage analyzer that provides detailed information on the distribution and use of disk space on a computer or server. It utilizes the curses library to display information in a human-readable format within the terminal. Ncdu scans specified directories and presents detailed insights into the size of directories and files.
This guide outlines the steps to install Ncdu on Debian (versions 10, 11, and 12) and all versions of Ubuntu.
Installation and Usage Guide
Step 1 - Update System
First, update the system packages:
apt update
Then, upgrade the system:
apt upgrade
Step 2 - Install Ncdu
To install Ncdu, execute the following command:
apt install ncdu
Step 3 - Launch Ncdu
Once installed, launch Ncdu with:
ncdu
This command will scan your current working directory and open the Ncdu interface.
Step 4 - Navigating in Ncdu
After scanning, Ncdu will display the structure of files and directories along with their disk usage:
- 1. Use the arrow keys to navigate through the files and directories.
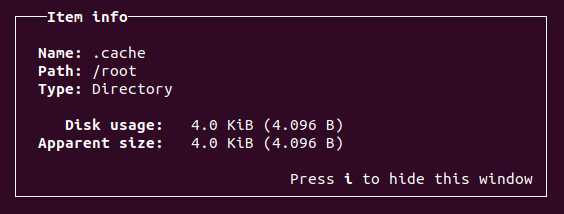
- 2. Press
i to view detailed information (path and disk usage) about the selected directory.

- 3. Press
i again to hide this information.
Step 5 - Sorting Files and Directories
By default, Ncdu sorts files and directories by size. To change the sorting order:
- Press
n to sort by name.
- Press
s to revert to sorting by size.
- Press
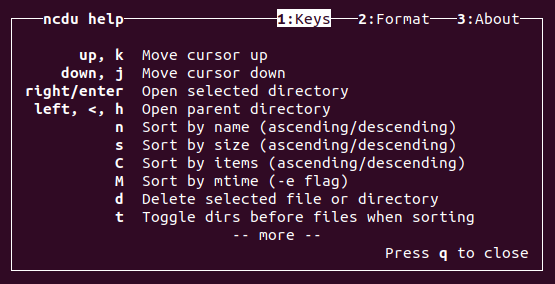
Shift + ? to view all sorting options.
Step 6 - Deleting Files and Directories
To delete a file or directory:
- Select the item with Ncdu.
- Press
d.
- Confirm the removal by selecting "Yes" or "No".
Step 7 - Additional Information
To view all available options and commands, press Shift + ? to open the Ncdu help window.

Step 8 - Exiting Ncdu
To exit Ncdu, press q.
Conclusion
With Ncdu, you can efficiently analyze and manage your server's disk storage. Its user-friendly interface helps you quickly identify and free up space by pinpointing large files and directories.